Colosseum Final 3
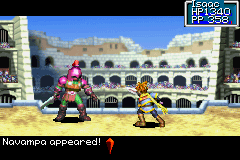
Colosseum Final 3 is the name Golden Sun gives to the third and last of the three series of puzzle-based stages that comprise the overall Colosso Finals. Unlike the last two series, Colosseum Final 1 and Colosseum Final 2, this is the match where Isaac is allowed to lose against his opponent in battle, the strongest Colosso Gladiator Navampa. If Isaac wins this match, however, he will receive the Lure Cap afterwards from Babi, and secret events in Golden Sun: The Lost Age that will result in gaining the Golden Shirt will trigger if this game file is saved as a Completed data file and is used for data transfer into the next game.
General Overview
This last series of puzzle-based stages is the longest and most challenging course. It has six stages running from left to right. Isaac's opponent is Navampa, and he will take one minute and twenty-five seconds to complete his side of the stages, which is the same amount of time you would take if you moved as fast as you can without any illegal assistance from your cheering Adept companions and went out of your way to collect all three treasure chests along the path, which is what he also does.
If you go through these stages as fast as possible with all shortcuts exploited and intentionally avoiding out-of-the-way chests, the quickest amount of time you can reach the end of the match is under 46 seconds. With this in mind, you should definitely take the time to take the contents of all the chests in this match because there is practically no risk of you arriving at the end too late if you exploit the shortcuts. Successfully exploiting all the shortcuts here and opening all three chests in this match, you can make it to the end in under one minute and five seconds.
The best setup for the four Adepts for this third and final Match is to arrange Djinn until Isaac is either in the Savage class or the Ninja class. Keep the Orb of Force equipped on Ivan as well as have Ivan be equipped with the Halt Gem, and equip the Frost Jewel on Mia. In the match itself, have Mia cheer at Stage 1 and cast Frost, have Garet cheer on Stage 2 and cast Move, and Ivan has a choice on which stage he can cheer and be helpful: on Stage 3 where he can use Halt to cut down on potential time-consuming risks or on Stage 5 where he can use Force to cut down on time. Stage 4 is where Isaac can cast Growth if he is in the Savage class to create his own shortcut while the match is in progress.
At the arena at the end of the match, the equipment rewards are a Claymore (+70 Atk) for the combatant that arrives first and a Hunter's Sword (+28 Atk) for the later one. The one-on-one "boss" encounter with Navampa begins when both you and he arrive at the central arena.
Stage 1: The Scales of Justice
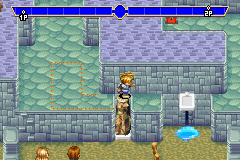
A stage that is lengthy on its own. From your starting point, if you run straight to the first white platform on the left, the platform will be weighted down to ground level while the white platform on the right is weighted up; the two platforms share a scale relationship. And stepping off the left platform while it's on the ground will make it rise back up and the right platform shift back down, and you will have to climb back up, having wasted a lot of time. When the stage is played normally, the only way you can go through it is to push the nearby earth pillar down two spaces and right four spaces, onto the platform so that it is permanently weighted down. Then you can cross to the other side hopping across the right platform. Ideally, it would take 15 seconds to jump the gap through this method, then an additional 4 seconds to retrieve the Smoke Bomb from the nearby treasure chest on top. (It takes Navampa this long to achieve these on his end, after all.)
The shortcut that you can create before the match with the help of a cheering Adept is extremely useful: Have an Adept with the Frost Psynergy cast Frost on the puddle of water, so that the resulting ice pillar will keep the right platform elevated and the left platform always down. With this, now Isaac can just hop to the exit without moving the earth pillar at all, and it can now take a mere 3 seconds to jump the gap. With a dozen seconds saved, you might as well grab the nearby chest.
Stage 2: The Stepping-Stone Stage
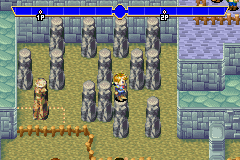
Looking at this stage at first, it should only take a moment to figure out the "normal" route through the stage, which is to hop across practically all of the gray stone pillars in a snaking fashion. Hop right, hop up, hop right three times in a row, hop down, run and hop left, hop down, run southeast two spaces, and hop right twice to reach the end of the stage. It takes 8 seconds to jump across the pillars normally.
Garet with his Move Psynergy can provide the stage's shortcut like he did in the previous two matches, and the shortcut should be clear: Cast Move on the brown earth pillar and move it right one space. That way, Isaac can instead hop right, then down onto the earth pillar instead of up, then right, then walk right, then hop twice to the stage's exit, taking up only four seconds instead.
Stage 3: The Wall Wedge
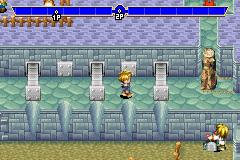
Perhaps the only stage in Colosso that actually requires a degree of skill on the player's part. An operator on the ground level operates a series of five pistons that extend out of and retract into the wall at set regular intervals, and Isaac is to run through the stage's path without being pushed off by a piston to fall to the ground level and waste time. However, it's hardly requiring of skill in the action game sense because it should still be easy to run-and-stop, run-and-stop the whole short way, and a player who's on top of things will make it past the pistons in just four seconds. Afterwards, an earth pillar blocking a path to a chest containing a Nut will constitute another five seconds, but it is a five-second period worth it for the nut.
This stage does have a shortcut-in-a-sense available, which is to have a cheering Adept before the match cast the Halt Psynergy on the operator so that the pistons will remain immobile. Isaac will be able to cross the stage in just three seconds, without the risk of being pushed off to the ground level and wasting a lot of time. It is not all that hard to get across the stage normally and safely, so if you're confident about your ability to run across a miniature obstacle course, you can have your cheering Adept instead cheer at stage 5 where he can use Force to cut down on more time.
Stage 4: The Free-Climb Area
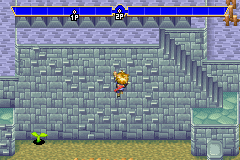
This stage is a wall-climbing stage that would take a period of time to make through any way you look at it, but is nonetheless fairly straightforward. Climbing the snaking ladder path on the wall, starting to the right of the plant and ending on the top left of the wall, takes up many of the nearly 15 seconds it takes at a minimum to enter and exit the stage itself.
Isaac himself can supply the means to take advantage of the shortcut here. If he is in the Savage class, he can stand in front of the small plant and cast the Growth Psynergy to make the plant grow into a vine that extends to the portion of the normal part of the wall climb that is near the end. Since opening up and selecting out of menus occurs in real time and thus counts against you as your opponent continues on his course, you will have to open up your Psynergy menu and cast Growth from it very quickly to maximize the time you save. Alternatively, if plan ahead and set Growth to a shortcut button, you can skip the menu altogether. Although, making it from end-to-end of the stage with the assistance of Growth will only end up saving three seconds, so that the whole stage takes 12 seconds total.
Stage 5: The Moving Sidewalk Stage
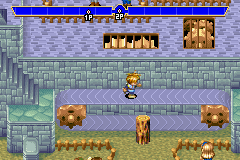
This isn't so much of a stage as it is a pathway that delays you if you don't have an Adept cheer here and make a change beforehand. It is essentially a horizontal conveyor belt that moves Isaac left away from the exit if he stays stationary on it, makes Isaac progress extremely slowly if he walks across it to the right, and slows him down to walking speed if he runs across it to the right. Running from the beginning of the stage across the conveyor belt to the exit on the right will take five seconds.
This stage's "shortcut" is created when a cheering Adept casts the Force Psynergy on the small log in front of the conveyor on ground level; the log will roll into the right gear and jam itself into position, causing the entire conveyor to no longer move. This effectively converts it into a typical pathway that does not slow Isaac down, and Isaac will now take only a little over two seconds to run from the left end of the stage to the right. The cheering Adept you can use for this stage can either be the one you might have considered using for stage 2 or the one you might have been using for stage 3; which two of the three aforementioned stages will have its shortcut made by an Adept is the player's preference.
Stage 6: Another Log-Rolling Area
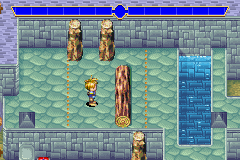
The most time-consuming stage of all. To make it to the end of the stage and the battle right afterward, you would roll the log on the left into the pond on the right and hop across it, and to do that you first need to push the center and right earth pillars out of its way. The fastest way to push the rolling log into the river is to first run over to the lower right earth pillar, push that off the edge to the bottom at ground level, then immediately push the center earth pillar two spaces up against the wall. Then go back behind the rolling log and roll it right into the lake. Hopping over it after this point, this entire operation takes 19 seconds.
The above method uses the stage's shortcut method that Isaac can make for himself, which is to push the right earth pillar near the edge of the stage off the stage quickly. The downside to doing this is that there is a chest located on the ground level accessible by a short ladder blocked off the top by the lower left earth pillar initially, and if the earth pillar is pushed off the edge at any point it will fall onto the path Isaac would have to traverse to get to the chest, effectively blocking off access. To get to this chest containing a Sleep Bomb while minimizing time, the stage should be done differently: First, have Isaac push the center earth pillar up two spaces, then place him to the right of the lower right earth pillar and push it left one space. Climb down, open the chest, climb back up, and then immediately push the lower earth pillar downwards off the stage. The path is now clear for the rolling log on the left to be rolled right into the lake. The quickest possible amount of time to complete the stage while getting the chest is about 30 seconds.
